- Author:
- Kaer
- Subject:
- Other, Computer Science
- Material Type:
- Activity/Lab
- Level:
- Middle School, High School
- Tags:
- License:
- Creative Commons Attribution
- Language:
- English
- Media Formats:
- Text/HTML
Education Standards
Storyboard info-template
video_storyboard
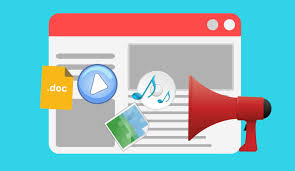
Digital Storytelling Application
Overview
This lesson is to teach students about different apps they can use to create their digital stories based upon the script that they wrote. In this lesson, they will explore different video-making apps and begin to create their video using their script and storyboards.
Summary
Note: Students will need to have a script and/or storybord finished previous to this lesson. The videos will be shared and presented to the class which will include an additional class period. (Please refer to the assessments section for the rubric).
In this lesson plan, students will take their storyboards that they wrote prior to class and turn it into a digital story. Students will need to have access to the internet and a video/audo recording device.
Time: 60 - 90 minutes
Format: Lesson can take an asynchronous approach in which brainstorming, recording and editing will take place in groups or individually, watch tutorial videos on their own and the final projects will be submitted online.
Utah State Core: Creative Communicator - Strand 6 Standard 2 and Digital Citizenships - Strand 4 Standard 3
ISTE 1 & 6
Background for Teachers
Teachers will need to be familiar with different sites that students can use to create their digital stories. Websites suggested for this lesson include Adobe Spark and WeVideo.
https://spark.adobe.com/sp/ Students will need have access to an Adobe account
https://www.wevideo.com/ Students can make a free account but downloaded videos will have a watermark
Basic understanding of digital storytelling (visit this website) and knowledge of video recording and editing is also required, refer to this video to learn the basics:
It's important to understand copyright laws and materials that fall under the fair rights use so that you may share that information with the students in regards of obtaining content for their video. Please refer to the attatched pdf or visit https://creativecommons.org/about to learn more
Step 1 - Goals and Outcomes
Learning intentions:
- Students will learn the basics of Digital Storytelling and what makes a good story.
- Student will use a video editing application to learn how to create a short video using text, audio, images and video files.
- Students will learn how to use the materials available to them online under creative commons and royalty free usage.
- Students will learn how to download their video or share a link to submit to the teacher.
Success Criteria: Students will use video making apps to create and share on original story.
Step 2 - Planning Instruction
Student Background Knowledge
- Prior to this lesson, students should have created the storyboards for their digital story so they are now ready to record video clips and input media files into video editing tool and speak the audio. Students need to review and pass off storbaords with the teacher before they start recording. (see attached resources)
Strategies for Diverse Learners
- ESL students can have Spanish and English subtitles in their videos.
- Students may choose which video editing app to use and the time frame for their created video may be shortened. Adobe Spark - Beginner. WeVideo - Intermediate.
Step 3 - Instruction
Instruction:
- Mini-lesson on different apps that can be used to create the videos. Share videos that teach how to use these sites. Could watch together as a class or students could choose which video to wathc on their own computer. (15 minutes)
- Think- Pair - Share: Have the students decide which app they will use to create their video, have the students discuss with their group, or decide individually. Have students create accounts for the video-making apps, if needed. (10 minutes).
- Have students begin to transport their material from the storyboard into these apps or a Google slide where they can film from. (15 minutes)
- Have students begin filming scenes from their storyboard and using audio for their videos. Import videos into video editing app. (students may want to do some filming at home) (30-45 Minutes)
- Royalty free music sites:
- Observe students and reflect with students if additional time is needed to complete the videos.
- Edit videos and add images, text and audio to create final project. Spend class time sharing videos with students or upload videos to a sharing site.
Adobe Spark Tutorial (6:28):
WeVideo Tutorial (6:18)
Here is an example of a video I made using WeVideo:
Step 4 - Assessments
Students will present their projects to the class the following class periods after they finish creating their videos.
You may use this rubric or create on of your own
| Graded on | 5 | 4 | 3 | 2 | 1 |
| Student’s digital story was concise and well thought out (1 to 2 mins) | |||||
| Content used was legal to use for educational purposes | |||||
| Participated in sharing prompts and storyboarding | |||||
| Final project was properly submitted to website on time to share |